9 Best Greenhouse Exhaust Fans (October 2026)
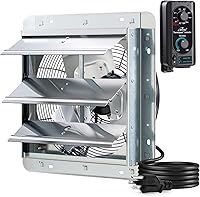
The best greenhouse exhaust fans include the iLiving 12-Inch Shutter Exhaust Fan with Thermostat for mid-size greenhouses, the iLiving 10-Inch Shutter Exhaust Fan with Thermostat for compact wall openings, and the VEVOR 12-Inch Exhaust Fan for damp growing spaces.
On this page (8 sections)
- Which greenhouse exhaust fans fit different ventilation needs?
- How do you choose the right greenhouse exhaust fan?
- Where should you place an exhaust fan and intake?
- Do you need thermostat or humidity controls?
- How do you use and care for a greenhouse exhaust fan?
- What mistakes should you avoid when choosing a fan?
- What else helps cool a greenhouse in summer?
- Which greenhouse exhaust fan should you choose?
The best greenhouse exhaust fan for most backyard growers is the iLiving 12-Inch Shutter Exhaust Fan with Thermostat. It pairs 960 CFM with adjustable speed and temperature control, while VEVOR sensor models suit growers who want humidity triggers and larger options serve bigger spaces with room for a wider opening.
A fan works as part of a ventilation path: warm air leaves through the exhaust, and replacement air enters through a separate opening. Before choosing by airflow, measure the greenhouse and decide where both openings can go.
For a broader summer ventilation plan, read how to cool a greenhouse in summer heat. If you're setting target temperatures, our guide to what temperature a greenhouse should be can help you plan.
Our picks at a glance
-
1
 Best for mid-size greenhouses
iLiving 12-Inch Shutter Exhaust Fan with Thermostat
9.0/10 our score
See it on Amazon -
2
 Best for compact wall openings
iLiving 10-Inch Shutter Exhaust Fan with Thermostat
8.5/10 our score
See it on Amazon -
3
 Best for damp growing spaces
VEVOR 12-Inch Exhaust Fan, Variable Speed and Humidity Control
8.4/10 our score
See it on Amazon
- 4
 Check it
VEVOR 14-Inch Exhaust Fan, Variable Speed and Humidity Control
Best for larger humid greenhouses - 5
 Check it
Amico 12-Inch Shutter Exhaust Fan with Thermostat
Best for thermostat-led airflow - 6
 Check it
VEVOR 14-Inch Shutter Exhaust Fan, 1400 CFM
Best for manual speed control - 7
 Check it
VEVOR 16-Inch Shutter Exhaust Fan
Best for planned custom wiring - 8
 Check it
iLiving 20-Inch Shutter Exhaust Fan with Thermostat
Best for expansive growing areas - 9
 Check it
VEVOR 16-Inch Exhaust Fan, Temperature and Humidity Control
Best for sensor-led large spaces
Which greenhouse exhaust fans fit different ventilation needs?
The iLiving models suit growers who want temperature control, while the VEVOR options add humidity triggers or higher stated airflow. Match the fan to your greenhouse volume, opening size, intake route and preferred level of automation.
iLiving 12-Inch Shutter Exhaust Fan with Thermostat: Best for mid-size greenhouses
- 960 CFM
- Variable speed and temperature control
- Automatic shutters
- Wall mount
The 12-inch iLiving balances moderate airflow with variable speed and thermostat control. Automatic shutters open and close with the fan.
Pros
- Variable speed and temperature regulation
- Automatic shutters
- UL/cUL listed
Cons
- Wall-mounted installation
- Electrical hardwiring is required
The iLiving 12-inch model is a balanced starting point for growers who want ventilation without jumping straight to a large fan. Its 960 CFM airflow and variable speed let you adjust ventilation, while temperature control can switch it on at a set point.
Automatic shutters open and close with fan operation. They keep the wall opening covered when the fan is off, but the greenhouse still needs a separate intake path for replacement air.
This is a wall-mounted unit, and installation requires electrical hardwiring. Confirm the opening dimensions and electrical plan before committing to a location.
Choose it for a mid-size greenhouse where you want temperature-based operation and adjustable airflow. For a smaller opening, the 10-inch iLiving may be a closer physical fit.
iLiving 10-Inch Shutter Exhaust Fan with Thermostat: Best for compact wall openings
- 820 CFM
- Variable speed and temperature control
- Automatic shutters
- 10-inch blades
This 10-inch option has lower airflow than the larger iLiving model and includes variable speed and temperature control. Its smaller blade size may suit a more compact wall opening.
Pros
- Variable speed and temperature regulation
- Automatic shutters
- UL/cUL listed
Cons
- Lower airflow than the 12-inch iLiving
- Hardwired installation
The 10-inch iLiving keeps the same basic control approach in a smaller fan size. It provides 820 CFM, variable speed and temperature regulation, with automatic shutters.
That lower airflow can make it a better match for a compact greenhouse than a larger fan, provided the greenhouse volume and ventilation target support it. Avoid choosing by fan diameter alone; greenhouse height and the path for incoming air matter too.
The unit is wall mounted and requires hardwiring. Check the cutout and installation requirements before placing it in a greenhouse wall or panel.
Pick it when a smaller opening and thermostat control matter more than maximum airflow. If you want humidity-triggered operation, compare it with the VEVOR 12-inch option.
VEVOR 12-Inch Exhaust Fan, Variable Speed and Humidity Control: Best for damp growing spaces
- 1500 CFM
- Temperature and humidity triggers
- Up to 10 speed settings
- Automatic shutters
Temperature and humidity triggers can adjust the fan across up to 10 speed settings. The controller also includes modes, a timer and an alarm.
Pros
- Temperature and humidity triggers
- Up to 10 speed settings
- Shutters close when the fan is off
Cons
- Wall-mounted installation
- Check the electrical connection and opening before choosing
The VEVOR 12-inch suits a greenhouse where humidity is as important as temperature. Its controller offers temperature and humidity triggers, up to 10 speed settings, multiple modes, a timer and an alarm.
The stated airflow is 1500 CFM, higher than the iLiving 12-inch models here. Compare that figure with your greenhouse volume and opening plan rather than treating it as an automatic reason to choose this fan.
Its shutters open when powered and close when off. The wall-mounted design needs a suitable opening and a clear intake route.
Choose it if you want the fan to respond to both temperature and humidity. If your greenhouse needs more airflow and can take a larger unit, the 14-inch VEVOR has a higher stated capacity.
VEVOR 14-Inch Exhaust Fan, Variable Speed and Humidity Control: Best for larger humid greenhouses
- 2000 CFM
- Temperature and humidity triggers
- Up to 10 speed settings
- Automatic shutters
The 14-inch version pairs higher stated airflow with the same temperature and humidity trigger approach as the 12-inch model. It suits growers who need more ventilation capacity and can fit a larger opening.
Pros
- 2000 CFM
- Temperature and humidity triggers
- Multiple modes and timer
Cons
- Larger wall opening needed
- Check the electrical connection before installation
This 14-inch VEVOR steps up to 2000 CFM and keeps temperature and humidity triggers. It also offers up to 10 speed settings, timer and alarm functions, which let you shape the fan's response to changing conditions.
The larger size needs more room at the wall. Measure the frame and check that the surrounding structure can support the installation before choosing it.
Use a separate thermometer and hygrometer to see how conditions change around your plants after the fan runs. Automatic triggers can help manage airflow, but you still need to check that air reaches the whole greenhouse.
This is a stronger fit for a larger greenhouse with a suitable wall and a need for humidity-based operation. For a 12-inch thermostat option with a pre-wired plug, consider the Amico.
Amico 12-Inch Shutter Exhaust Fan with Thermostat: Best for thermostat-led airflow
- 1282 CFM
- Thermostat probe
- 8 speed settings
- Automatic gravity louvers
The Amico combines a thermostat probe with eight speed settings, so you can set an automatic temperature trigger and adjust airflow. Its gravity louvers close when the fan is off.
Pros
- Thermostat probe
- Eight speed settings
- Pre-wired standard 120V plug
Cons
- Check the stated airflow and coverage figures against your greenhouse
- Wall-mounted installation
The Amico 12-inch combines 1282 CFM with a thermostat probe and eight speed settings. The probe can trigger the fan at a preset temperature, while speed control lets you adjust airflow.
Its automatic gravity louvers close when the fan is off, and the unit has a pre-wired standard 120V plug. Check the installation instructions and your greenhouse's electrical setup before mounting.
The product information gives more than one coverage figure, so greenhouse volume and your temperature readings are better guides than the stated area alone. A 12-inch fan can still be too much or too little depending on the structure and airflow path.
Choose it if you want a thermostat and several speed options. If humidity triggers are more useful than a thermostat probe, compare the VEVOR 12-inch model.
VEVOR 14-Inch Shutter Exhaust Fan, 1400 CFM: Best for manual speed control
- 1802 CFM
- Stepless variable-speed control
- Automatic shutters
- Steel housing
The included controller offers stepless speed adjustment without a temperature or humidity trigger. Its shutters close when the fan is off to help block rain and small debris.
Pros
- Stepless variable speed
- Automatic shutters
- Steel housing
Cons
- No temperature or humidity triggers described
- Check the electrical connection before installation
This VEVOR 14-inch fan offers stepless variable-speed control, but no temperature or humidity triggers are described. Its stated airflow is 1802 CFM, and the automatic shutters close when the fan is off.
That simpler control setup can work if you prefer to adjust the fan yourself or already use a separate thermostat. The steel housing and wall-mount design suit a fixed exhaust location.
Although the title calls it a 1400 CFM fan, its specifications state 1802 CFM. Confirm the current airflow figure and plan around the model's dimensions before sizing the ventilation system.
Pick it if you want variable speed without sensor-based automation. For a controller that responds to humidity, the 14-inch VEVOR with temperature and humidity control is a better match.
VEVOR 16-Inch Shutter Exhaust Fan: Best for planned custom wiring
- 2000 CFM in specifications
- 16-inch blades
- Automatic shutters
- Controller not included
This larger VEVOR fan has 16-inch blades and automatic shutters. A speed controller and power plug are not included, so plan for the wiring and controls you need.
Pros
- 16-inch blades
- Automatic shutters
- Steel housing
Cons
- Speed controller not included
- Airflow differs between title and specifications
The VEVOR 16-inch is a larger shutter fan for greenhouses that need substantial exhaust capacity. Its specifications state 2000 CFM, and the larger fan needs more room at the wall than the smaller picks.
A speed controller and power plug are not included, so account for those parts and the wiring plan before buying. The automatic shutters open during operation and close when the fan is off.
The title describes 2438 CFM, while the specifications state 2000 CFM. Verify the figure and installation details before using it to size a greenhouse ventilation system.
Choose it when the opening, wiring and control plan are already clear. For built-in temperature and humidity triggers, consider the VEVOR 16-inch model below.
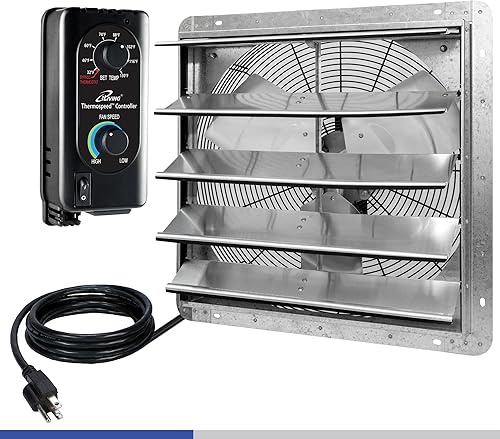
iLiving 20-Inch Shutter Exhaust Fan with Thermostat: Best for expansive growing areas
- 3368 CFM
- Variable speed and temperature control
- Automatic shutters
- 20-inch blades
The 20-inch iLiving is the highest-airflow option here, with variable speed and temperature control. It calls for a larger opening and careful airflow planning.
Pros
- 3368 CFM
- Variable speed and temperature regulation
- Automatic shutters
Cons
- Largest fan in this group
- Confirm your wall can accommodate its dimensions
The 20-inch iLiving is the highest-airflow option here, with 3368 CFM and variable speed and temperature control. Its wide frame calls for a substantial mounting area.
This may suit a large greenhouse with a planned exhaust opening and enough intake area to replace the air being removed. In a smaller structure, it could move more air than you need, so consider the target temperature and controls before choosing it.
Automatic shutters open and close with the fan. The unit is wall mounted and comes fully assembled.
Choose it for a large growing space where high airflow and thermostat control fit the ventilation plan. For similarly high airflow with humidity triggers, compare the VEVOR 16-inch option.
VEVOR 16-Inch Exhaust Fan, Temperature and Humidity Control: Best for sensor-led large spaces
- 2900 CFM in specifications
- Temperature and humidity triggers
- Up to 10 speed settings
- Automatic shutters
This VEVOR combines a larger 16-inch frame with temperature and humidity triggers and up to 10 speed settings. The stated airflow differs between the title and specifications, so confirm the current figure before sizing your setup.
Pros
- Temperature and humidity triggers
- Up to 10 speed settings
- Timer and alarm
Cons
- Airflow differs between title and specifications
- Larger wall opening needed
This VEVOR 16-inch adds temperature and humidity triggers, up to 10 speed settings, a timer and an alarm. Its specifications state 2900 CFM, though the title gives a different airflow figure.
The larger frame calls for a suitable wall opening and a clear replacement-air path. Use its automatic controls as part of a setup you can monitor with separate instruments.
Check the current airflow figure before using it in a sizing calculation. The difference between the title and specification makes confirmation a practical step for this model.
Choose it if you need a large fan with automatic temperature and humidity response. For high airflow with thermostat control instead, the iLiving 20-inch is another fit.
How do you choose the right greenhouse exhaust fan?
Choose a greenhouse exhaust fan by matching its airflow and controls to the greenhouse's volume, opening and intake path. Fan diameter alone doesn't show how much ventilation your plants will receive.
Calculate the greenhouse's approximate volume by multiplying its length, width and average height. Use that number as a starting point, then consider climate, crop needs and how often you want the air exchanged.
Compare the fan's CFM with your ventilation goal, and check that the structure can take the unit. More airflow can be a poor fit for a small greenhouse if it causes fast temperature swings or pulls air through openings that don't serve the growing area.
The greenhouse thermometer guide explains how to track conditions where plants grow. If moisture is your main concern, read how to control greenhouse humidity before choosing sensor features.
What does CFM mean for a greenhouse exhaust fan?
CFM means cubic feet of air moved per minute. A higher CFM rating generally indicates more airflow, but the greenhouse volume, fan installation and intake opening affect how well that airflow exchanges air.
Use CFM as one part of the decision, not a promise of a specific temperature drop. Screens, wind, ducts and the shape of the greenhouse can all restrict airflow.
When a fan's published airflow figures conflict, don't build your sizing plan around the larger number without checking it. That applies to the VEVOR models in this roundup whose titles and specifications differ.
How much airflow does your greenhouse need?
The right airflow depends on the greenhouse's size, climate and plants, so first establish the volume and the conditions you want to manage. A small propagation space and a tall, densely planted greenhouse don't have the same ventilation needs.
Think about the hottest part of the day and the air path through your structure. If one corner stays hot while the fan runs, the issue may be intake placement or blocked circulation rather than a need for a larger fan.
A fan with adjustable speed gives you room to tune airflow after installation. If you want it to respond without manual changes, look for temperature or humidity triggers that match your priorities.
Where should you place an exhaust fan and intake?
Place the exhaust high in the greenhouse so it can remove warm air, and give replacement air a clear path through a lower or opposite opening. The fan can't move air effectively if the greenhouse is sealed.
Keep the intake far enough from the fan that air travels through the growing space instead of leaving immediately. When the intake sits beside the fan, some areas may stay warm and still.
Screens can help keep insects out, but they add resistance to airflow. Keep them clean, and check temperatures around the plants after installation to see whether air moves through the whole structure.
Choose a wall position that leaves enough room for the fan frame and its wiring. For structures with plastic walls or panels, greenhouse plastic sheeting options can help you plan where openings can be cut and sealed.
What should you check before installation?
Measure the wall area and compare it with the fan's dimensions and mounting requirements. Leave room for the frame, shutters and a secure mounting surface, and make sure the opening won't interfere with doors, braces or shelving.
Plan the intake opening at the same time as the exhaust. A fan with a clear path to bring fresh air in can ventilate the growing area more evenly than one that pulls against a closed wall.
Check the electrical connection and installation instructions before buying. Some options here require hardwiring, while the Amico is described as having a pre-wired standard plug; the large VEVOR 16-inch model does not include a power plug or speed controller.
If the wall uses greenhouse film or panels, make a clean, supported opening and seal around the frame to reduce gaps. Keep the fan and intake clear of hanging plants, shelves and equipment that could obstruct the air route.
Do you need thermostat or humidity controls?
A thermostat helps automate ventilation around a chosen temperature, while humidity triggers can make a fan respond to damp air. Manual speed control gives you direct adjustment, but requires you to monitor conditions and change settings.
A temperature controller can reduce the need to switch the fan on and off by hand. Choose a control range that suits your crop and expected temperatures, and keep a separate thermometer to confirm conditions.
Humidity control can help when moisture builds up, but ventilation works best when outside air can replace the air leaving the greenhouse. Read how to control humidity in a greenhouse for other ways to manage moisture alongside airflow.
Which control type suits your routine?
Choose thermostat control if your main goal is to prevent the greenhouse from climbing past a temperature you set. The iLiving models and Amico offer temperature control, with the Amico pairing a thermostat probe with eight speed settings.
Choose humidity triggers if damp conditions are a frequent concern and you want the fan to respond to both temperature and moisture. The VEVOR sensor models add multiple modes, speed settings, timer and alarm features.
Choose manual speed control if you're comfortable checking the greenhouse and adjusting airflow yourself. It keeps the controls straightforward, but it won't automatically react to a warm afternoon or a damp spell.
How do you use and care for a greenhouse exhaust fan?
Use the fan with an open intake route, a temperature or humidity target that suits your plants, and routine checks of the air around the growing area. Basic upkeep means keeping the fan, shutters and intake clear so air can move.
After installation, run the fan and observe whether air enters through the intended opening and reaches the greenhouse's far side. Check temperature and humidity at plant height in more than one spot, then adjust speed or trigger settings if conditions vary.
Inspect the shutters regularly for dust, leaves or plant debris that could stop them opening and closing freely. Keep nearby screens and intake vents clear, since a clogged intake can limit airflow even when the fan is running.
Follow the fan's own instructions for cleaning and electrical care. Switch off power before cleaning around the fan, and avoid spraying water toward its motor or controls.
What mistakes should you avoid when choosing a fan?
The most common mistakes are picking by fan diameter alone, blocking the intake, and assuming a larger airflow figure guarantees better conditions. A fan needs to fit the greenhouse and the way air moves through it.
Don't assume the manufacturer's stated coverage area maps directly to your greenhouse. Roof shape, height, plant density, screens and openings all affect how air moves, so compare the airflow rating with your volume and check the results after installation.
Don't mount the exhaust where it will pull air from a nearby intake without ventilating the rest of the space. Keep the intake on another side or lower down, and check for warm pockets after the fan starts.
Avoid buying a model with controls you won't use or a connection that doesn't suit your installation plan. A sensor-equipped fan adds useful automation for some growers, while a simpler controller can be easier to manage for someone who prefers manual adjustments.
Finally, don't ignore conflicting airflow information. For the VEVOR models with different figures in the title and specifications, confirm the current value before relying on it in your ventilation calculation.
What else helps cool a greenhouse in summer?
An exhaust fan works best with a deliberate intake opening, shade and regular temperature checks. Ventilation alone may not keep a greenhouse cool during extreme outdoor heat.
Shade can reduce the heat entering through the cover, while an exhaust fan removes some warm air. Make sure the fan's intake path isn't blocked by benches, dense plants or stored tools.
For a complete summer plan, see how to cool a greenhouse in summer heat. If you grow in a walk-in structure, the walk-in tunnel greenhouse guide can help you think through structure and layout.
Which greenhouse exhaust fan should you choose?
Choose the iLiving 12-inch if you want moderate airflow with variable speed and temperature control. Pick a VEVOR sensor model when humidity triggers matter, the Amico for thermostat control with several speeds, and a 16- or 20-inch fan only when the greenhouse volume and opening support it.
Start with measurements, plan the intake and exhaust route, then compare airflow, controls, opening size and electrical requirements. The right greenhouse exhaust fan is one you can install safely, monitor around your plants and adjust to the conditions you need to manage.
Our top 3 picks at a glance
-
1
Best for mid-size greenhouses
iLiving 12-Inch Shutter Exhaust Fan with Thermostat
9.0/10 our score
See it on Amazon -
2
Best for compact wall openings
iLiving 10-Inch Shutter Exhaust Fan with Thermostat
8.5/10 our score
See it on Amazon -
3
Best for damp growing spaces
VEVOR 12-Inch Exhaust Fan, Variable Speed and Humidity Control
8.4/10 our score
See it on Amazon
Frequently asked questions
How do I size a greenhouse exhaust fan?
Start with the greenhouse's volume by multiplying its length, width and average height. Then compare the fan's CFM with the exchange rate you need for your climate and crop.
Check that the opening and intake path suit the fan, and monitor temperatures after installation.
Should a greenhouse exhaust fan have a thermostat?
A thermostat can switch a fan on when the greenhouse reaches a chosen temperature. Variable speed gives you more control over airflow, while humidity triggers may suit a damp growing space.
Keep a separate thermometer at plant height to check whether the fan's settings match conditions.
Where should I install a greenhouse exhaust fan?
Mount an exhaust fan high on a wall where it can remove warm air, and provide a path for cooler replacement air on the opposite side or lower down. Follow the fan's installation instructions, keep openings clear, and monitor temperatures around the greenhouse after setup.
Can an exhaust fan cool a greenhouse without an intake vent?
An exhaust fan needs replacement air to enter the greenhouse. Without a clear intake path, airflow can be restricted and the fan may not exchange air effectively.
Use an intake opening on the opposite or lower side, and choose screening that keeps insects out without blocking too much airflow.
Does a greenhouse exhaust fan control humidity?
Ventilation can remove some warm, humid air when outside air is drier, but a fan cannot guarantee a target humidity. Watering, plant density and weather also affect results.
A humidity-triggered model can respond to a threshold, while a separate hygrometer helps you track conditions.